
This isn’t a detailed instruction. Lets hope photos can show the obvious but if you are happening upon my blog and want to ask a question about doing this please do. I might take a few days to respond but I will!
I got a used $20 rabbit cage with the footprint in inches: 41L x 20 H x 18 W – from a local pet Facebook group I am a member of and purchased 10ft of mesh that was 24 inches in height and 1/2 in spacing as to convert this to a hamster cage I had to cover over the 1 inch bar spacing which is too wide to contain a Syrian (an obviously smaller dwarf species) hamster. I would have needed a couple more feet of mesh had I not used the metal coated grid that came with it (used for the floor with rabbits and guinea pigs if you are old school but is not recommended at all) to secure to the back to save me time and mesh/ hardware cloth.
What you need:
1. Hardware cloth either 1/4 or 1/2 spacing. Amount of feet depends on size of cage but get more than you need is rule of thumb to cover mistakes.
2. Cable ties
3. Wire cutters and needle nose pliers (mine is both needle nose and a cutter)come in handy to thread ties through hard to reach areas. You’ll know what I mean when you begin cable tying the mesh flush to the sides while reaching an arm inside the front or top door to reach as far as possible deep inside.
4. Measuring tape or ruler.
For the shape of this cage that had thick bar framing and arched top I decided to measure (forgot to to snap photo of measuring tape) it in sections and cut out the mesh. For sharp ends I added a couple inches to the width and height of the sections so I could bend an inch over to have a non-sharp edge all around.
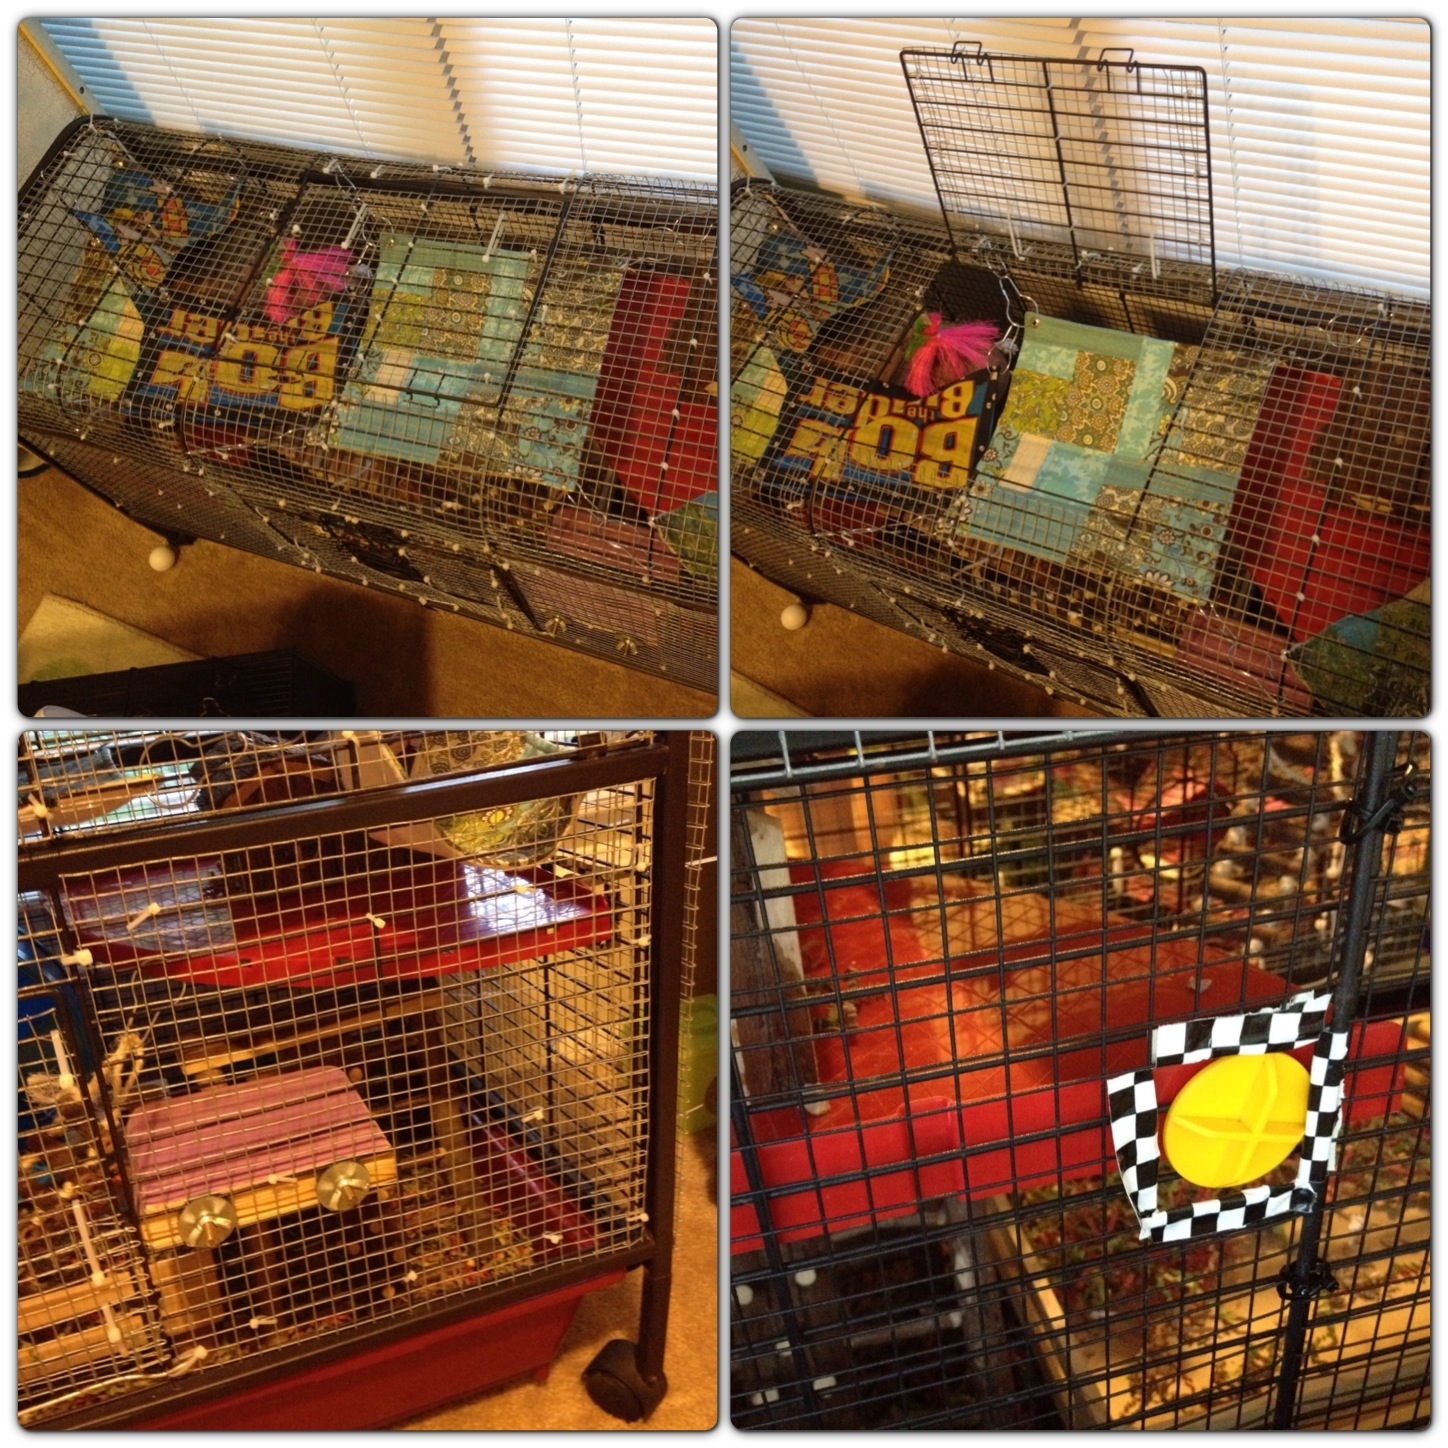
I decided to put everything inside as I wanted it set up so that I could find where I might have issues hooking hammocks to the top once meshed over or the shelf connected to the sides or water bottle. And adjust as I went along. I found that this was best and that I came to no issues except with the shelf I found I needed to cut squares in the grid in the back and the mesh on the right side to be able to remove the shelf if need be.

I was in a rush and to secure the mesh tightly and flush and uniform to the cage it requires much cable ties all over in any place you notice the mesh sticking up away from the bars. I would recommend not to be in such a rush and place your ties less haphazardly. Not that how I randomly did so is any less secure but normally I am fixated on appearance of cages and liking things to look organized and symmetrical. If that matters to you then take more time.

It has a front and top door and the entire arched top opens like a door but I cable tied that closed but meshed the top and front doors separate so I could continue using them. With the front door I came across the issue of the bars under the door where when it opens down it would be stuck by the mesh under the hinges so I used steel thick wire I had in hand with a steel cutter I have TI attach with cable ties to make a bar in the middle of the spacing to give it 1/2 inch spacing which will contain a Syrian hamster. Same with the spacing above the door. For extra security with the steel wire and the grid metal backing I criss crossed the cable ties like an X over sections where the original bars of the cage criss crossed.
The door itself I left the middle unmeshed as the way it opens you squeeze the latches like a spring. That area has a bar running down to make it cubed spacing and i felt it makes it small enough an opening I wasn’t concerned with my hamster being able to squeeze through. But you have to keep every possible vulnerability like this under consideration.
 It took me a few hours in total and as always a few scrapes to the skin as I am. A little clumsy. Gloves would probably be wise. It’s also not the most attractive cage on the outside but oh how it’s perfect size and with so many options for set up and my Bob LOVES his space and toys and levels. As my girl Penny runs about on her turn free ranging I watch Bob run about the entire perimeter of his cage and its so fun!
And I love a project. And I love to share my projects for both pride in accomplishment and public small pet awareness.
This is yet another alternative for spacious and cheaper housing for your hamsters in the USA or any country where it is difficult to find hamster cages that are humanely sized.
I also have a video compilation of Bob using every bit of his new cage and cheeky Penny makes a couple appearances (she was in heat that day and teasing poor Bob dreadfully). I am using a wordpress app for iPad which doesn’t let me embed youtube so if you come here before I can edit this to add the video please come back a little later to refresh.
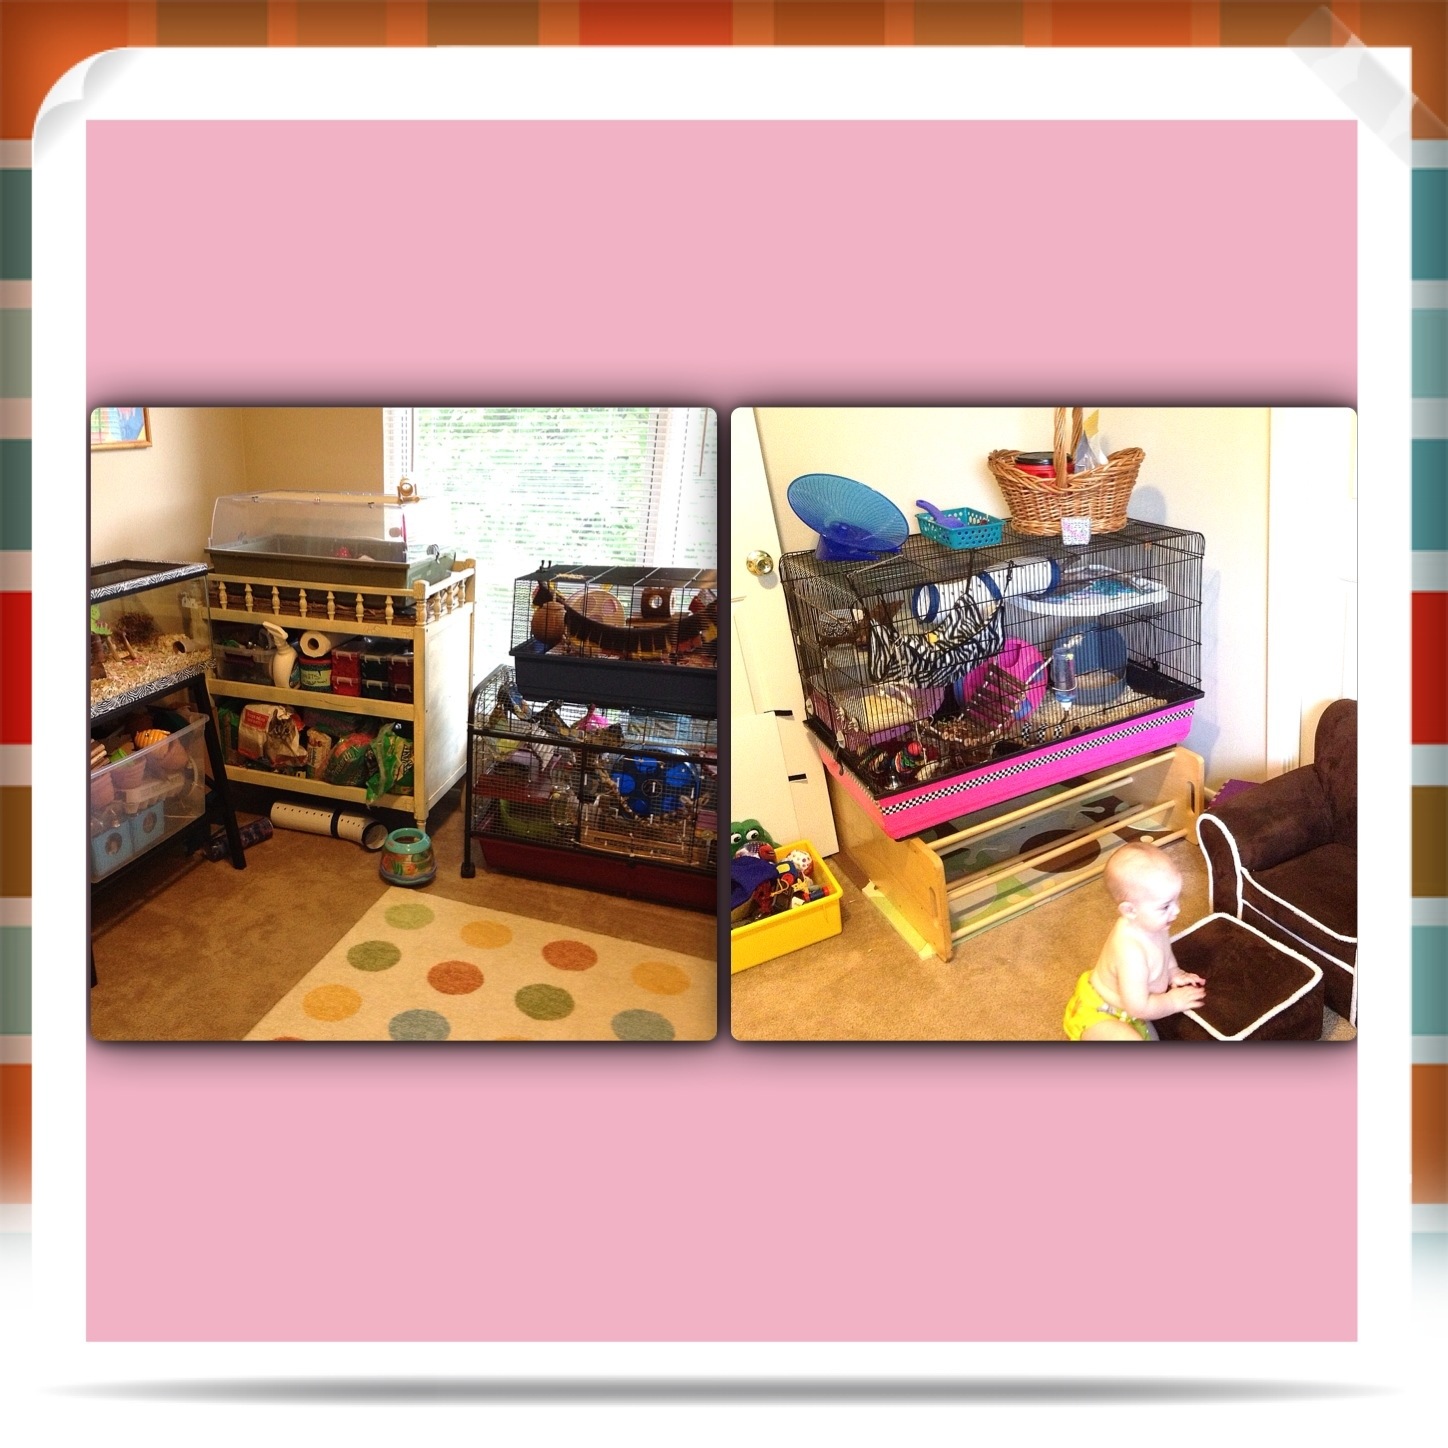
Lastly here is a shot of my updated hamster room. I rearrange it when I vacuum the entire room. I have placed Snow in the Tamburino and Strawberry is now in the Kevin. Patch is in the 20 gallon as he has slowed down lately and been not coming out much. When I put him back in a 20 gallon tank he has resumed his activity. Those Roborovskis of mine have always preferred tank like environments. They appear to not like cage bars/ mesh. Too many smells and sounds perhaps. Maybe the scent of other hamster species freak them out. Rest assured all my hams seem very content now and so am I. Finally.
As of now I believe I have finished cage purchasing and DIY. Next year we’ll be getting a bunny and DIY cages will resume. For now I am going to begin posting other people’s set ups (with credit and shout outs whenever possible). Because I still LOVE to see creative cages!
I want to twist my friend Kerri’s arm to share her process here as a guest poster for her IKEA Billy hack for her dwarf Smudge.

Just beautiful!
Thank you!!! I am anxious to see your updates on your bunny enclosure!!
I still can’t get over watching Bob run from one side of this new cage, to the other!! It is so much space for him! I also like to see that you were able to put all of his hammocks in for him. He looks so at ease & at home already:-). Awesome DIY…well done!! Leave it to Ms. Penny Lane to get Bob all hot & bothered while he’s enjoying his new abode;-) lol
Since the summer is coming up & I’ll have time to devote, I may let the arm be twisted for a post about Smudge’s cage. I love sharing ideas with others and getting ideas from others regarding cages, which is why I can completely feel comfortable in saying that I blame you for my newest cage itch for bigger space for Darwin;-). Lol
I understand that itch so bad. I cannot tell you how I have obsessed over Bob getting a bigger space for a VERY long time. Not long after I got that Kevin 82 actually. I love that cage and it’s ample for a Syrian but I am just so obsessed with large cages personally. I know he was fine in his Kevin. Just like I believe Darwin is fine in his cage! But it’s just even more fun for them and us the bigger it gets LOL. I’m sure if I had a wrap around cage in the house it would be just fantastic to watch Bob or Penny do their thing in the evening! Could you imagine a wrap around detolf like hamster cage? LOL. I could see it happening in my house. That is the scary part.
Have I told you how utterly envious I am of your hammy room? Because I’m totally envious, lol. 😉 Love how colorful and organized it looks, your hammies are so lucky. 😀
Aww! Thank you! LOL. When I had ferrets I kept a ferret room. So, I was anxious to do the same thing for the hammys! When it’s possible it’s so great. But it might not always be possible. In fact temporarily I might have to move them back downstairs as my niece may be coming a few weeks this summer and she’ll need a room! I have NO idea how I’ll manage that as we have NO room in our living room now that I have gerbils and a fish tank!
Looks great! I love watching Penny run around the outside, so cute!
Did you see her climbing on the side of the cage to tease him? LOL. Sheesh. She is something else.
*hugs* I hope you are doing alright physically and emotionally. I think of you a lot.
I love it 🙂 Also naughty Penny, leave poor Bob alone! 😛
Isn’t she being horrid!!! Girl has too much power!!! Lol
Awesome looking setup!
Thank you so much!!!!
I made this using the larger living world cage for rabbits, used chixken fencing, and this thing turned out awesome. Only issue is this thing is so huge my hamster has no clue how to get down so she jumps and falls a long way down. She LOVES it, she doesnt do any of her weird habits anymore or anxious running.
Thanks for taking the time to put this out on the internet! I just bought a rabbit/guinea pig cage at a bargain price in the hopes of doing just this, and figured I’d look online to make sure I wasn’t wasting my time. My only concern is my daughter’s hamster chewing through the plastic zip ties. Has this been a problem for you at all? I have the plastic ties, but will go to the hardware store for the metal clips, if need be.
Thx for the info & ideas!! Im. about to start my 1st cage conversion process for my winter white dwarf, Chi Chi. I’m not sure if you still check this blog but I’m hoping u do bc I’d really like to know what kind of mesh/hardware cloth u used for this project?? When i looked up ‘mesh’ on Lowes website there were a gazillion choices! Hope to hesr from ya! thx