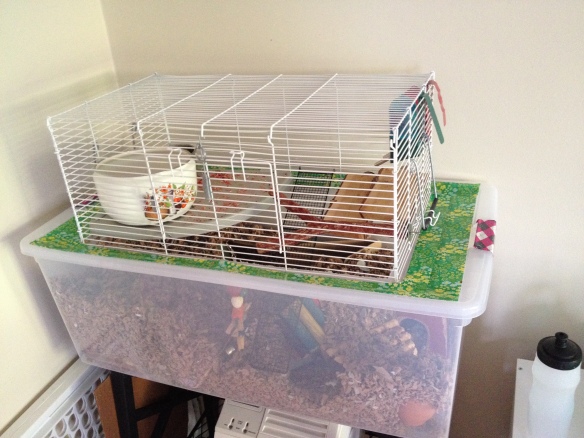
A request was made for me to show how I made my gerbil bin cage with attached cage topper. Credit for the original idea is here and if you scroll down the post they made they will show you a diagram of how they made their own bin cage with cage topper. I only slightly deviated from their original design.
Please read all the warnings I post throughout this post. And watch the included video by Erin’s Hamsters about Travel with Hamsters as she mentions many things that I do not NOT mention here and is valuable information. If one finds I have neglected to mention something vital please comment. Any other polite and reasonable and constructive suggestions are welcome in comments.
A WARNING: I first must make note that there are many risks with making a bin cage for travel in this way. I have made this decision based on personal factors about our travel situation. My gerbils’ welfare situation. And the extensive period of time of our limbo while in transit and temporary lodging (could go well over a month). But a topper on a bin for travel could be dangerous for your rodents as if they are on a shelf in the topper when one brakes suddenly or even slightly they could be flung from the shelf and onto the bottom of their bin or against the sides of the cage. ETC. These are VERY important considerations to make. Overall I would recommend with hamsters using only a bin cage with meshed lid or meshed sides if you need to stack – as a topper only adds risk to injury. One must consider the risks and personal factors about their transit situation. As one would not be leaving a sand pot or water bottle attached for the travel for gerbils its also really better not to use a topper. As stated our personal situation/factors require me to risk use of a topper for my gerbils.
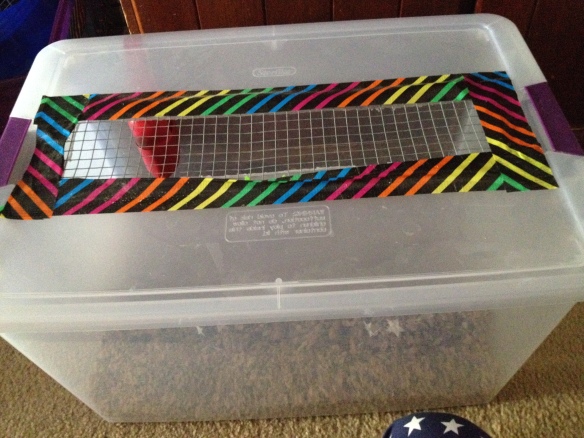
A smaller, simple bin cage like this is the more ideal for travel than attaching a topper and would be what I would primarily recommend if bin cages are your choice for travel (if you do not wish to use a small wire cage) *** the wire mesh is attached to this lid by cable ties – duct tape is only for decorative purposes. ****I post warnings about temperature safety/bin cages/cars later on in this post –
*Another warning – cutting plastic either by using sharp instruments, heated instruments, etc is dangerous and permission and help from a parent is necessary. For anyone in general this is something to do out of reach of small children and at a time when you have no outside or environmental distractions. In my post (Click here) on how to make a bin cage I mention about proper ventilation, proper tools, safety items, etc when using heat to cut a window in plastic.
That out of the Way –
I used a 110 qt Sterilie Bin with locking lid which I purchased from Big Lots for about $13. But for Travel purposes a smaller size would do – anything that is not smaller than the actual cage top you are going to use as a topper. The cage top must be smaller than your lid!
I took a pen or sharpie and I traced the cage top onto the lid to give me the idea of where to cut.
I used the cage top of a Grreat Choice (Petsmart) hamster cage. The 1/2 inch bar spacing would only be appropriate for large adult dwarf hamsters, Syrian hamsters, and gerbils. As you can see it’s much smaller than the bin cage I chose to use. Also note I still have lid attached as the cage top will be wired to the actual lid to secure it for safety and convenience. Also, the decorative duct tape covering the top of the lid is not necessary. I just like things to be pretty. It’s on the outside of the lid and so the gerbils have no access to the duct tape. It does not harm them or improve or detract from the function of this cage.
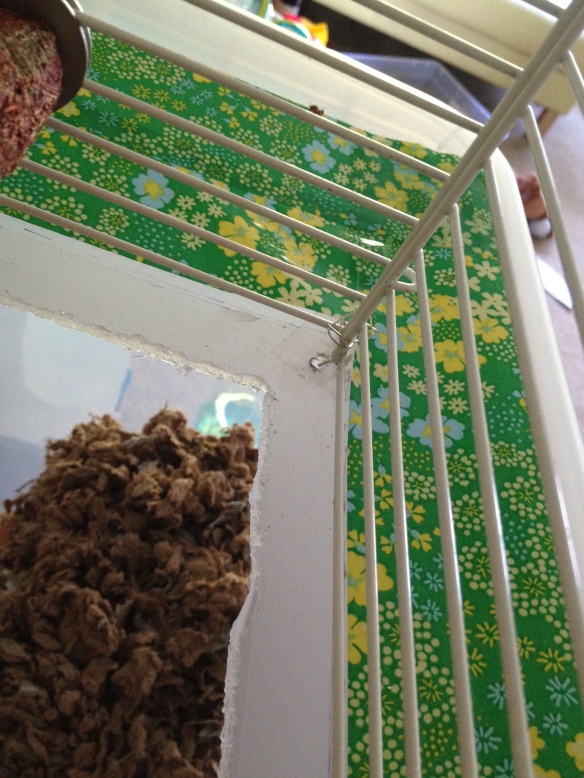
This is a picture taken from inside the topper of the bin cage. Notice the window that I cut – is an inch or so from where the cage top sits and is wired to the lid at the corners and the mid sections of the plastic lid for security. I used a ruler and from the original trace I made of the cage measurements – I measured an inch deeper with the ruler and made a series of dots signifying the perimeter and connecting the dots with a ruler and a sharpie/pen to make the square outline that would become the window.
****WARNING ALSO, the window border of the lid is wide enough to securely support the cage top but that it is narrow enough that the gerbils cannot access the plastic lid to use as a shelf to sit on and therefore CHEW it as Gerbils are apt to do and can only access the edges of the lid window if their bedding gets high enough that they can stand upright and nibble it. DO keep an eye on that. It has to be noted that in the case of gerbils THIS IS a risk as if they ever pile up their bedding high enough to the side for instance – to stand on their back legs and reach the edge of the lid window and chew they could eventually make a gap in the lid to escape.
For hamsters this could also be a risk if there are any platforms or other ways the hamster can reach and access the edges of the lid from the bottom of the bin.
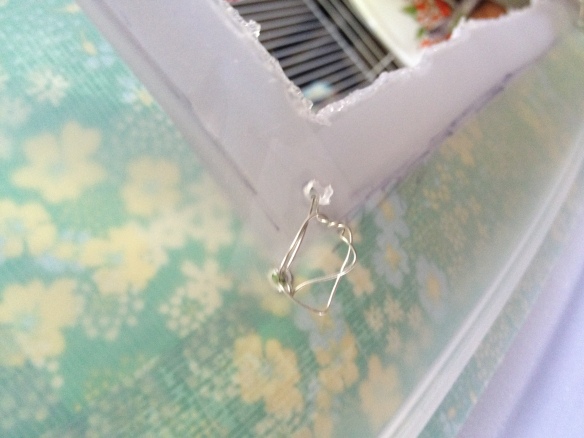
This is the underside of the bin cage lid. Notice that you can still see my pen outline? That is the original tracing that shows you exactly where my cage top is situated on the top of this lid – to give perspective. Also this picture shows that I put holes in the lid so I could loop through the wire around the bottom of the cage bars and the corner and mid sections of the bin cage window – fastening them together and in place. That way when I lift the lid I take the cage top with it securely. That is convenient for cleanings and such obviously. And in travel or in general use the cage top is not going to slide and fall possibly harming your rodent and aiding in their escape! A rodent loose in a car during travel would be absolutely horrifying.
WARNING – (Be sure that no pointy ends of the wire is sticking out as this could injure your rodent! Plastic Cable/zip ties can also be used. As your rodent should not have access to this portion of the lid anyway to chew. If they do chewing only the plastic ties is the least of your worries – they might chew the entire border of the window of the lid!!!)
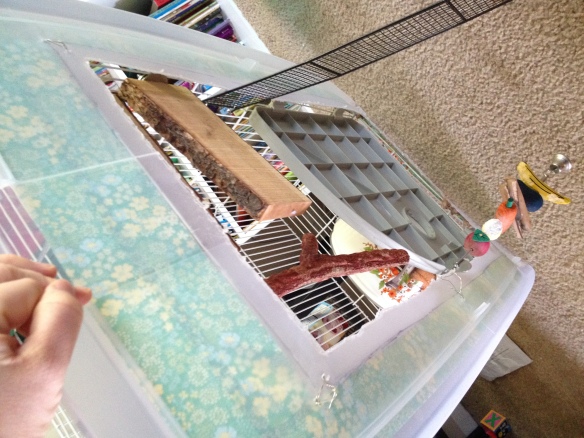
Another view of the underside of the lid for perspective. I dangled a chew toy by hooking it on the cage bars.
Important Note about Heat & Hydration: Also water bottles should be removed because the vibration of the vehicle is going to cause constant leaking – soaking their bedding causing discomfort, mold, mildew. It will not aid them in their thirst whatsoever. What is better is at every stop to offer them the bottle holding it to them or attach while the vehicle is shut off. And also to keep a segment of carrot/cucumber in their cage for them to nibble. The moisture from the carrot will keep them hydrated.
Just remember to replace the water bottle when you have stopped for the night or at your destination.
WARNING: And do not leave your pets in the vehicle for extended periods of time in hot or cold weather despite what methods you use to keep them warm or cool. If at all. Even in warm or slightly cooler weather an enclosed car produces a green house effect which causes it to get incredibly hot really quickly and will suffocate and cause heat stroke to any live occupants inside. Add in that a bin cage despite how much meshed windows it has – will still become hotter than a wire cage that has plenty of ventilation all around. Bin cages need to be kept out of direct sunlight. All windows need to be cracked to allow air flow. Items like battery operated fans might help if they are situated in such a way your rodent cannot reach it with their teeth through the bars to chew. Blocking sunlight using portable sunshades for covering the inside of your car windshield is very important for stops as well.
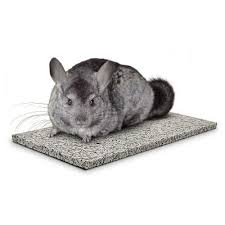
Suggestions to be weighed: Chinchilla cooling stones like this:
laying on top of bedding might help give the rodents a place to lay upon to cool themselves. Keep in mind a stone may very well slide in transit especially in a sudden, severe braking incident. There should be plenty of bedding to keep it nestled well. Bedding needs to be plentiful to help keep the rodent feeling secure from the vibrations of the vehicle movement and to keep them from sliding about as well.
SHELVING
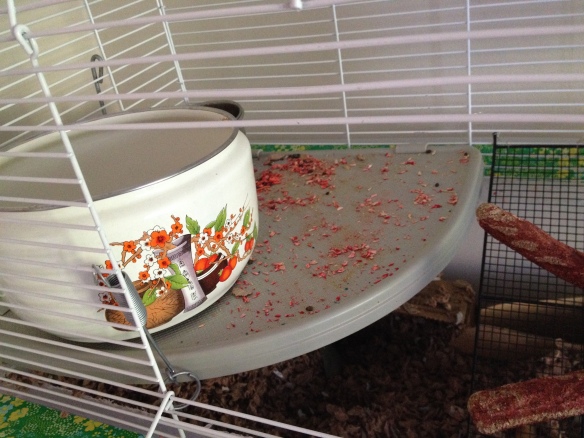
For my shelf I was fortunate. I have another hamster cage that came with this plastic shelf that I was not using. It’s light weight and rounded and was perfect in size and weight for this topper. The key is to make and or find shelving that is lightweight. If you use heavy shelving like heavy wooden shelves this might cause your lid to cave in. Plastic storage bin lids are pretty flexible and not very sturdy. Holding a light weight hamster cage top is not a problem but once you start adding on items to the topper keep in mind the weight and keep an eye on how the plastic lid is handling it. Also for travel purposes you don’t want to be picking up something incredibly hefty when you are in and out of hotel rooms.
****Keep in mind that while traveling I will be removing the metal Sand pot for my gerbils. It would fly and fall onto the gerbils when we put on the brakes. This could injure or kill your rodent!
From sites like Critter-cages you can peruse their cage replacement parts to find plastic shelving. One particular that I have noticed for sale on their site CLICK HERE. But peruse their site for other viable options for light weight shelving. With gerbils any plastic in their cage can become fair game for chewing. At this time my gerbils do not chew this plastic shelf. I keep an eye on every bit of this shelf daily for evidence of chewing.
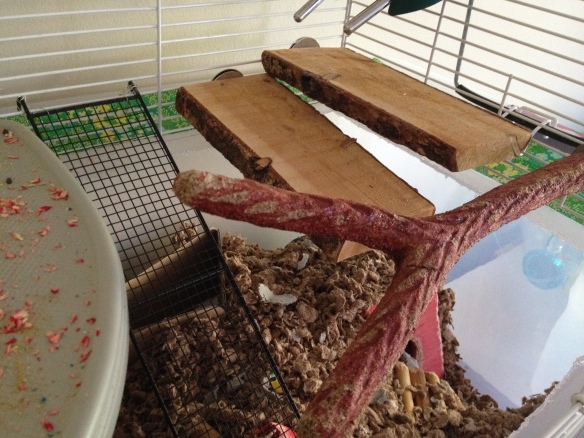
These wooden ledges that attach to cages are actually very light weight. I purchased them from PETCO online and find them usually only by using the search window of their site and entering in “Wooden Ledge”. I would link them but links for petco often expire so often it’s pointless. Just do a search on their site text box.
I also use a ramp ladder that I purchased from critter-cages CLICK HERE. Hamsters could get bumble foot from excessive climbing up wire like this. But for temporary transit situations I don’t see the harm. Gerbils from what I understand do not get bumble foot and this ramp is chew proof so very appropriate.
This video by ErinsHamsters is very important to view about traveling safe with hamsters. I HIGHLY recommend watching it.
NOTE: Her context is for general travel and not with the perspective of those of us (Armed Forces) that often do not have a choice but to make frequent and very long moves with our pets. We just have to make very carefully planned and wise decisions about the safety of our pets while in transit. Small cages are safer but for those of us who could be in limbo from a move for over a month – in and out of hotel rooms and temporary lodging like those of us in and affiliated with the Armed Forces are going to consider larger travel cages so that our little furry loves are not cramped for too long a period of time. If one has the room it would be best to put our small ones in a tiny cage for the travel portion of our day and then once in the hotel putting them into a larger cage. But I do not find this practical for my particular personal situation.
Video From Erin’s Hamsters Youtube: https://www.youtube.com/user/ErinsHamsters

You r awesome!
Do u still use this website?? I’d love to help with this ❤ I'm proud owner of 2 dwarf hamsters One chinees and the another russian breed. with 2 cages of 100cm x 200cm hehe :3
Can I travel with a hamster on a plane?