
**This page was posted to spread the word on how you can make a bin cage but original credit for how to prettify it and the original look was based off a Hamster Central member: aka Gutterglitterxx aka Marquelle’s design. Her original bin made me fall in love with bins cages!! Here is the one she made for her dwarf hammy Roxy RIP. 
Check out Updates (at the very bottom of this page) as of August 2013 – adding front doors to a bin!
Alright, so you’ve taken a gander at the cages available in the U.S. You’ve joined a hamster community and learned your cage is too small. Whatever! We’ve probably all been there. I know I have. In the 1980s when I had hamsters and was a little girl I just kept them in a used fish aquarium. I cannot remember the size but I believe it was about a 15 gallon or so. Back then you just put in a metal runged wheel and a bowl of food. A loo roll to chew on. A water bottle. And at that time the hamster ball came about and that was probably the most enrichment we could think of then. Of course fondly I remember that as soon as my hamsters were awake I was playing with them outside the cage. There was certainly no lack of free ranging and attention.
In this day of age we should know better or should begin to. Hamsters need more space than we’ve been led to believe. It makes sense though doesn’t it? They travel for miles upon miles across rocky, sandy, and woody terrain searching for food and mates. They dig deep burrows to store food and sleep. Put into a small cage with very little to do but run in a wheel or a session in a hamster ball is not really a good life. Especially, if you cannot spend hours upon hours in the night enriching their life with free ranging and play pens and affection. But even still – a tiny cage with a thin layer of bedding and just a wheel and a hideout is just not enough!
But it’s almost impossible to find a decent sized cage appropriate for a hamster in most pet shops in this country! Or you have to spend SO MUCH MONEY to get one shipped from online stores! Many people choose hamsters because they want a pet to love but cannot afford most. Well, my friends, hamsters aren’t cheap. Once you have a vet bill or two and buy proper safe bedding, and a decent diet you realize they aren’t going to be some cheap pet. There is no such thing as a cheap pet unless it’s a rock. But compared to many animals hamsters are more affordable to keep up than most and a BIN CAGE is an alternative to help keep up the frugal funding.
So, do you have a Critter Trail or Habitrail style cage that you bought in the beginning? Don’t throw it away!
I could have done that with my first cage. But instead I took it apart and used bits and pieces of it for various things. As well another cage by Ware I took apart for my 2nd bin cage. In the process of making the 2nd bin cage I decided to grab my iPhone and snap pictures of the process so anyone desperate for a happy, healthy habitat for their hamsters either because you cannot afford the more expensive cages or because you cannot find adequate ones in your area – will be able to make your own! Don’t have a cage to use for parts? Go to a hardware store or order off amazon – “Hardware Cloth – 1/4 or 1/2 inch (grid style mesh) will do for any hamster species.
1st – find a nice sized, sturdy, clear bin with a snapping lid. I chose a Sterilite 106 quart for my first bin which I found for about $10 at Walmart. And for my 2nd I chose a 110 quart. The bin pictured below is 110 quart and I found it at Big Lots for about $12.

In order of going across –
1. Got your bin! (Took this picture as afterthought – already had got started!)
2. Have all your supplies ready. You are going to need a serrated knife – sturdy and sharp and with a point on the end. Wire cutters. Soldering Iron & Mask (optional). Zip ties. Scissors. Marker
3. Mesh/hardware cloth or recycled cage bars.
4. Mark the edges to make note of where you want your mesh/cage bars to go and to get an idea of where you are going to cut your window. You want your window to be smaller than your mesh because you want at least a half inch to inch of plastic to secure your mesh against with the zip ties.
5. The marks are for the mesh and the lines drawn are where I’ll cut the window.
6. I put duct tape on the outside of the cutting line to make it more difficult to crack the bin as I cut through. Then I put the mesh back up to decide where to put my cable tie holes and mark them with dots.
7. Time to move it near an open door/window and turn on the fan.
8. Open the door or window. You don’t want fumes!
9. Got the mask on. Turned on the soldering iron. (optional to thin out the plastic to make it easier to cut through with knife).

10. The ruler is great safety tool. And it keeps the soldering iron straight as you gently apply pressure and work your way down the line melting away some of the plastic. The ruler of mine has a metal strip that the iron is leaning on. Not the wood.
11. Using the soldering iron I push through the holes for the cable ties. Or you could use a hot knife or drill (1/4 bit).
12. Got a flame of some sort (safety people. Safety!) I used a candle. With my first bin I used the flames from my gas stove). And heat your knife over it.
13. Then push through the plastic. With mine I pushed through then sliced down. I did saw bit by bit with a still hot knife. Sometimes I got cracks though. But mostly that’s okay because tape is going to be hiding it anyway. When you get a crack you can soldering it back together by melting it a bit or you can just put duct tape on both sides to keep it in place as you move on so it won’t continue to crack.
14. Sand down the plastic edges that have sharp pieces jutting out. This keeps your hamster from poking itself! And gives a cleaner looking finish.
15. Put your cable ties in the way you wish.
16. Secure your mesh and zip the ties super tight before trimming them with wire cutters or scissors.
17. Have fun taping. Duck Brand Duct tape with the decorative patterns is AWESOME. I collect them!
18. And to show my other side! Finished!
Now for a bin that is stand alone or will be the top of the stack you will want to do the same with the lid. Here is a picture of my 1st bin I made. The middle portion is left for stability.

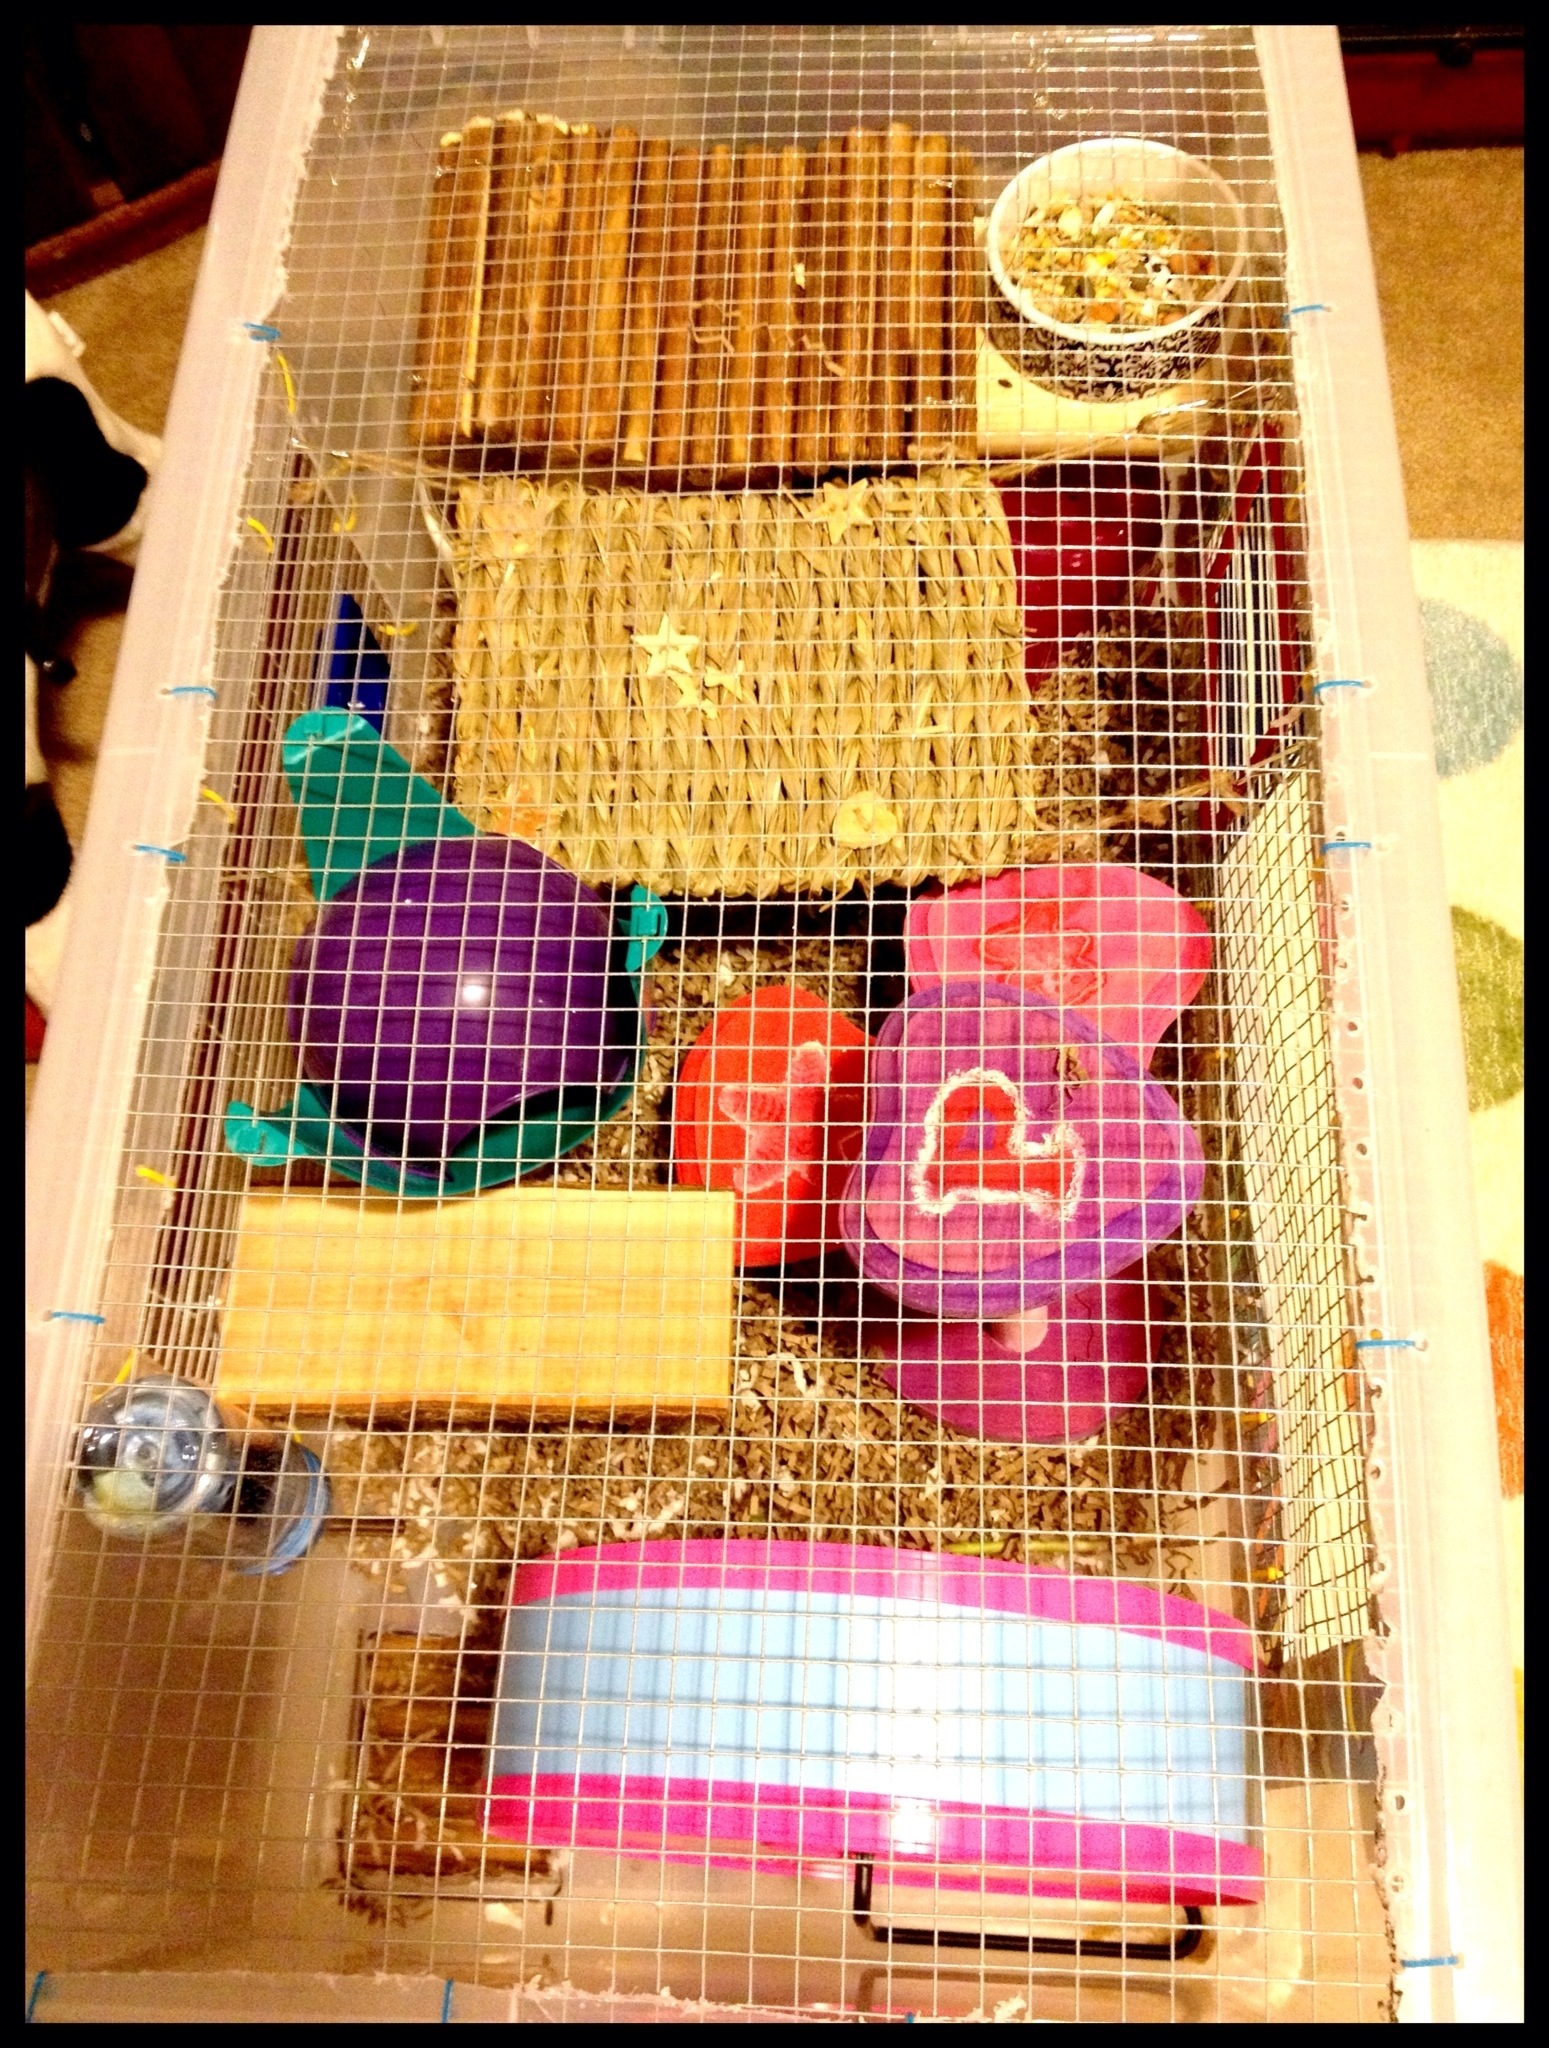
And then I connected the bins! To give my Strawberry a mansion! The cage bars I used have tube holes for tubing to connect. Perfect for my bins. So, I took Crittertrail tubes and voila! Absolutely fantastic. But you don’t have to have these cage pieces to connect your bins. Other people have cut a hole in the bottom of the top bin and the top of the lid of the bottom and put tubes in that way. Or from the side. Use your imagination! Just be sure the tubes are fastened well. That the hamster can’t push it out or chew away at a gap around it and escape. You are going to have to study your work and think like a rodent! There are ways to connect without needing tubes. If you have high platforms made or connect shelves your hamster might simply be able to just hop into the other one via a hole. Or you can make ladders with craft sticks that can reach! Your imagination is the limit! But stacking is optional. If you get a big enough bin one is very suitable for your hammy baby.


Now this is for a Dwarf hamster. But if you have a Syrian you are going to need wider tubes than Crittertrail. There is something called Superpet Ferre trail Fun-nels Tube Maze. It’s a bit pricy on Amazon but you could get it and connect the bins internally from bottom of the top bin to the lid of the bottom bin and have it lead down to a platform and make a ladder to the platform so you’d not need a LOT of those tubes.
If you are brave and know your hamster isn’t a big plastic chewer you could opt for the Ware Fun Tunnels (they are like a hard plastic colorful clothes dryer tube – that open and close like an Accordion instrument). At this time I will link it (products on Amazon come and go so if the link is bad – try doing a search of the name of it)
I highly suggest with the Ware Fun Tunnels to connect with those using from the INSIDE and not the outside. Someone who tried this particular tube out noticed her usually non-chewer Syrian Hamster began to indeed chew on these. She then connected it from within and all is well now.
Someone commented with the suggestion of Habitrail Ovo Tubes though I have no personal experience with those – but you might want to give that a try.
Hope that helps. If you try any of these tubes and wouldn’t mind sharing your experiences, qualms, tips, success – please do!
But with my current double decker bin for one of my Syrians – I just have a shelf on the bottom with a bendy wooden arch bridge from Petco as a step and a hole in the bottom bin lid and the top bin floor and she just hops right up the shelf, arch, then top bin with no problems at all. No fuss with tubes.
He enjoys his new play loft. I have much more to do with it now that it’s connected. I’ll post updates here as they come. I also will post other examples of other bin stacking by others to give other ideas. Give me some time and come back for those updates! Hope this helps! Happy Bin Cage Making!
I’ll end with a video of Strawberry’s reaction to the connection!
UPDATE!
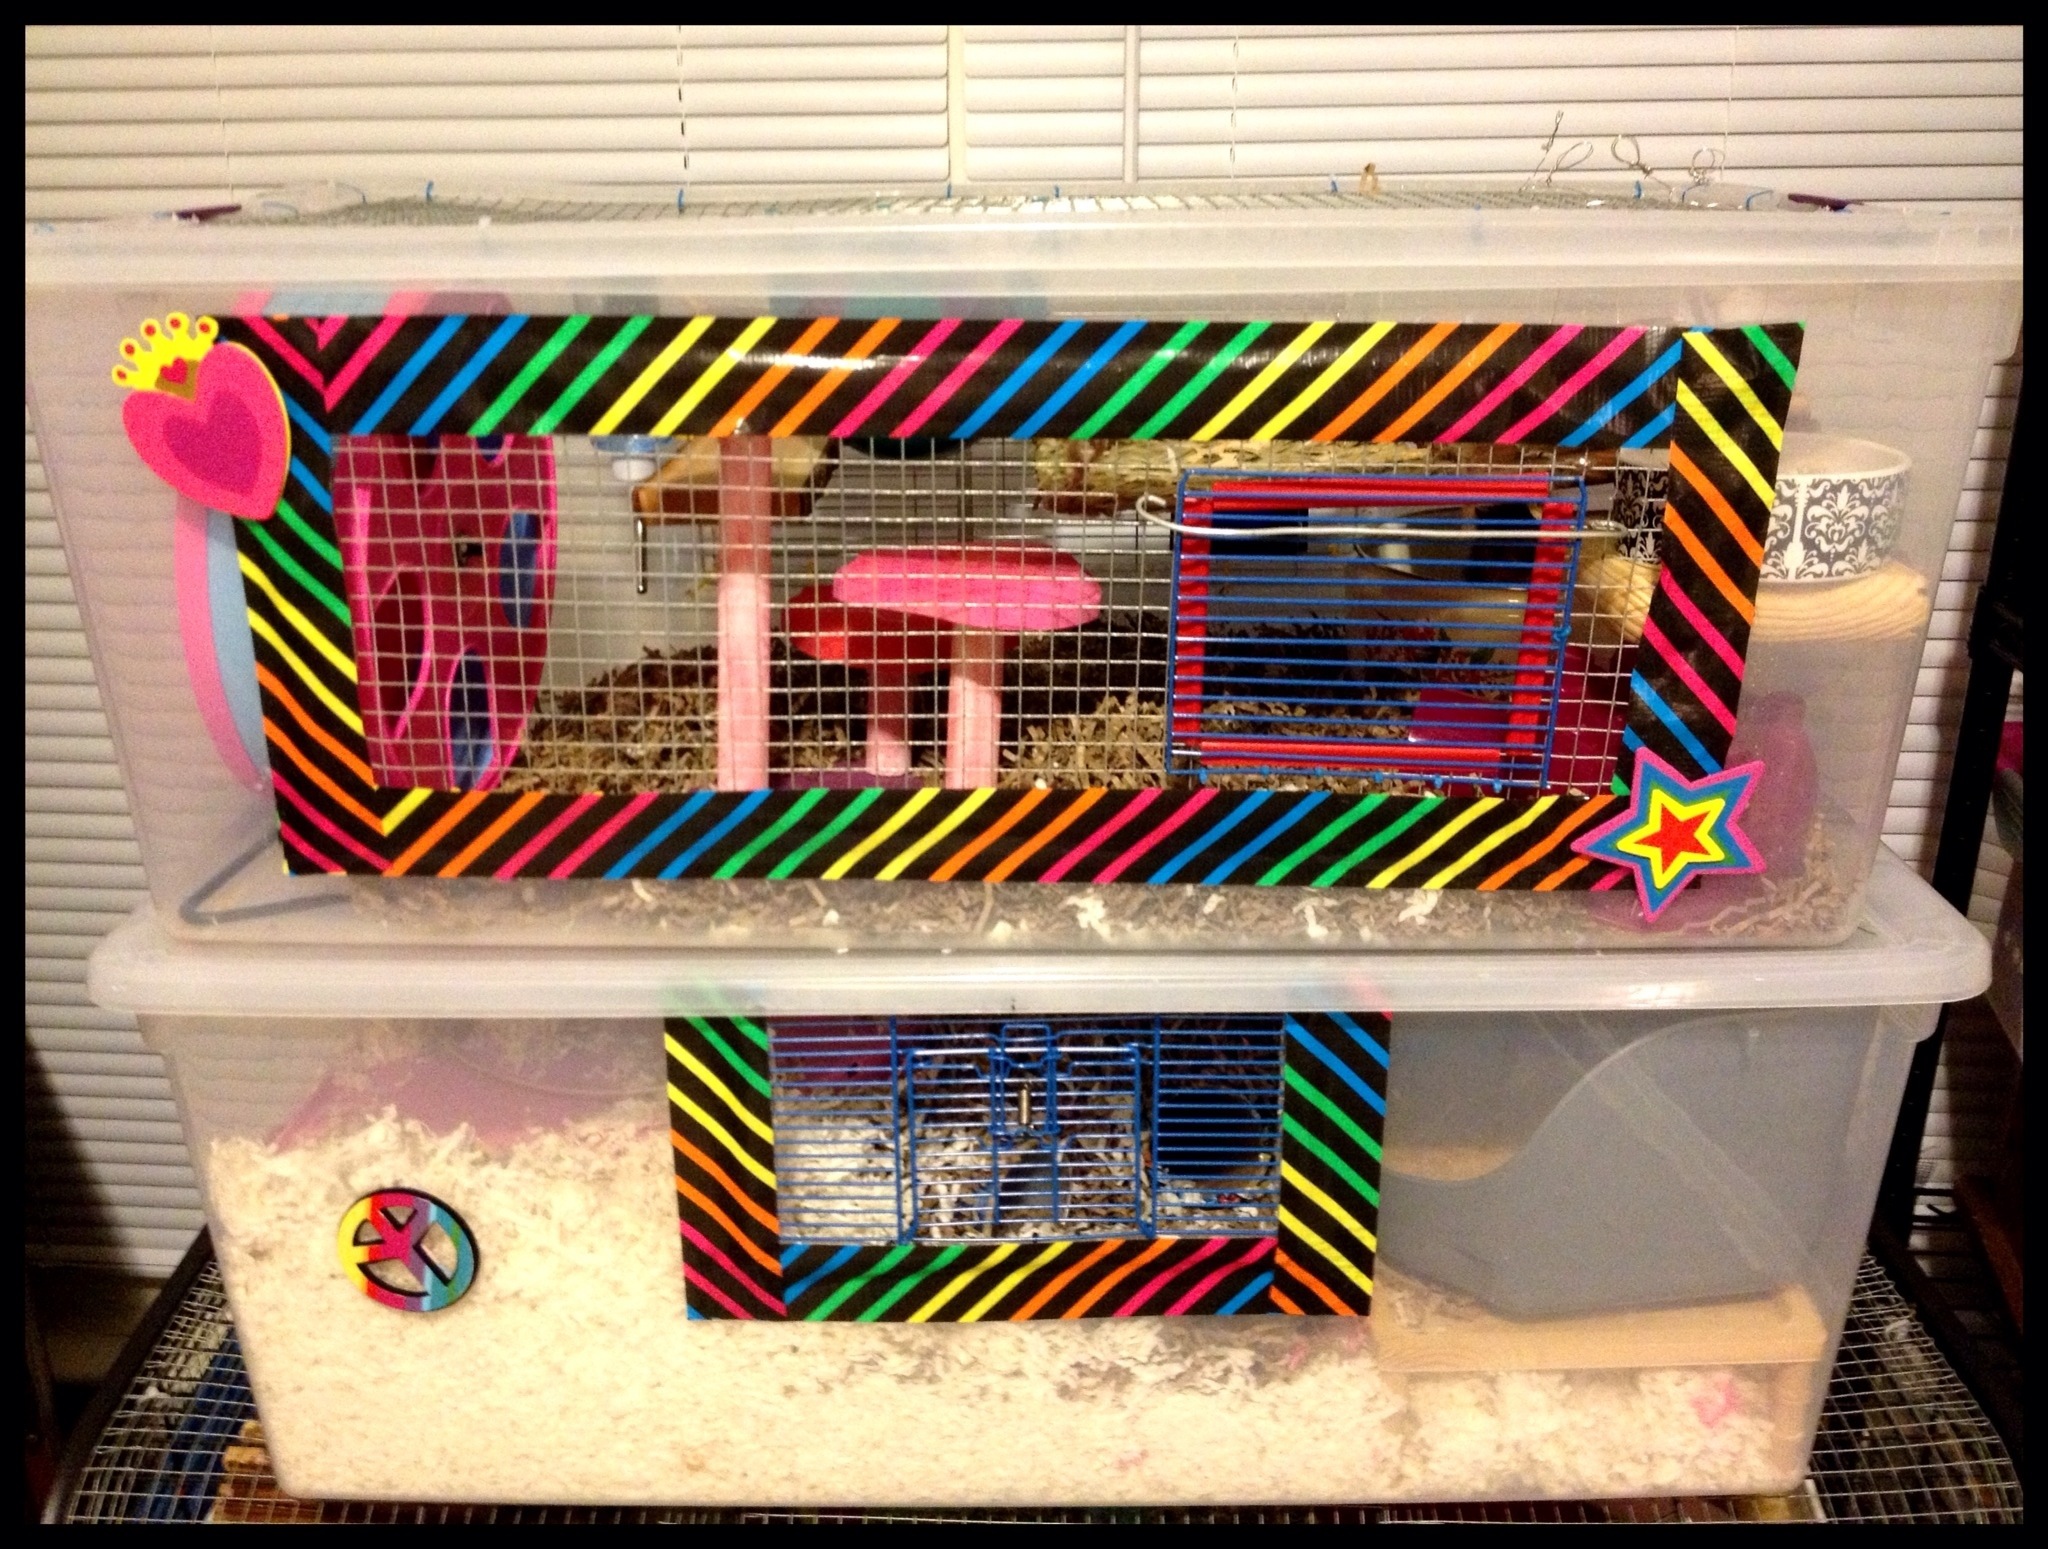
So, I now have a double decker bin for my Syrian Penny. It’s two 110qt Sterilite bins. I would like to show this bin here to suggest also adding a front door. Recycle old cage doors or make your own. There are various create ways to latch doors.
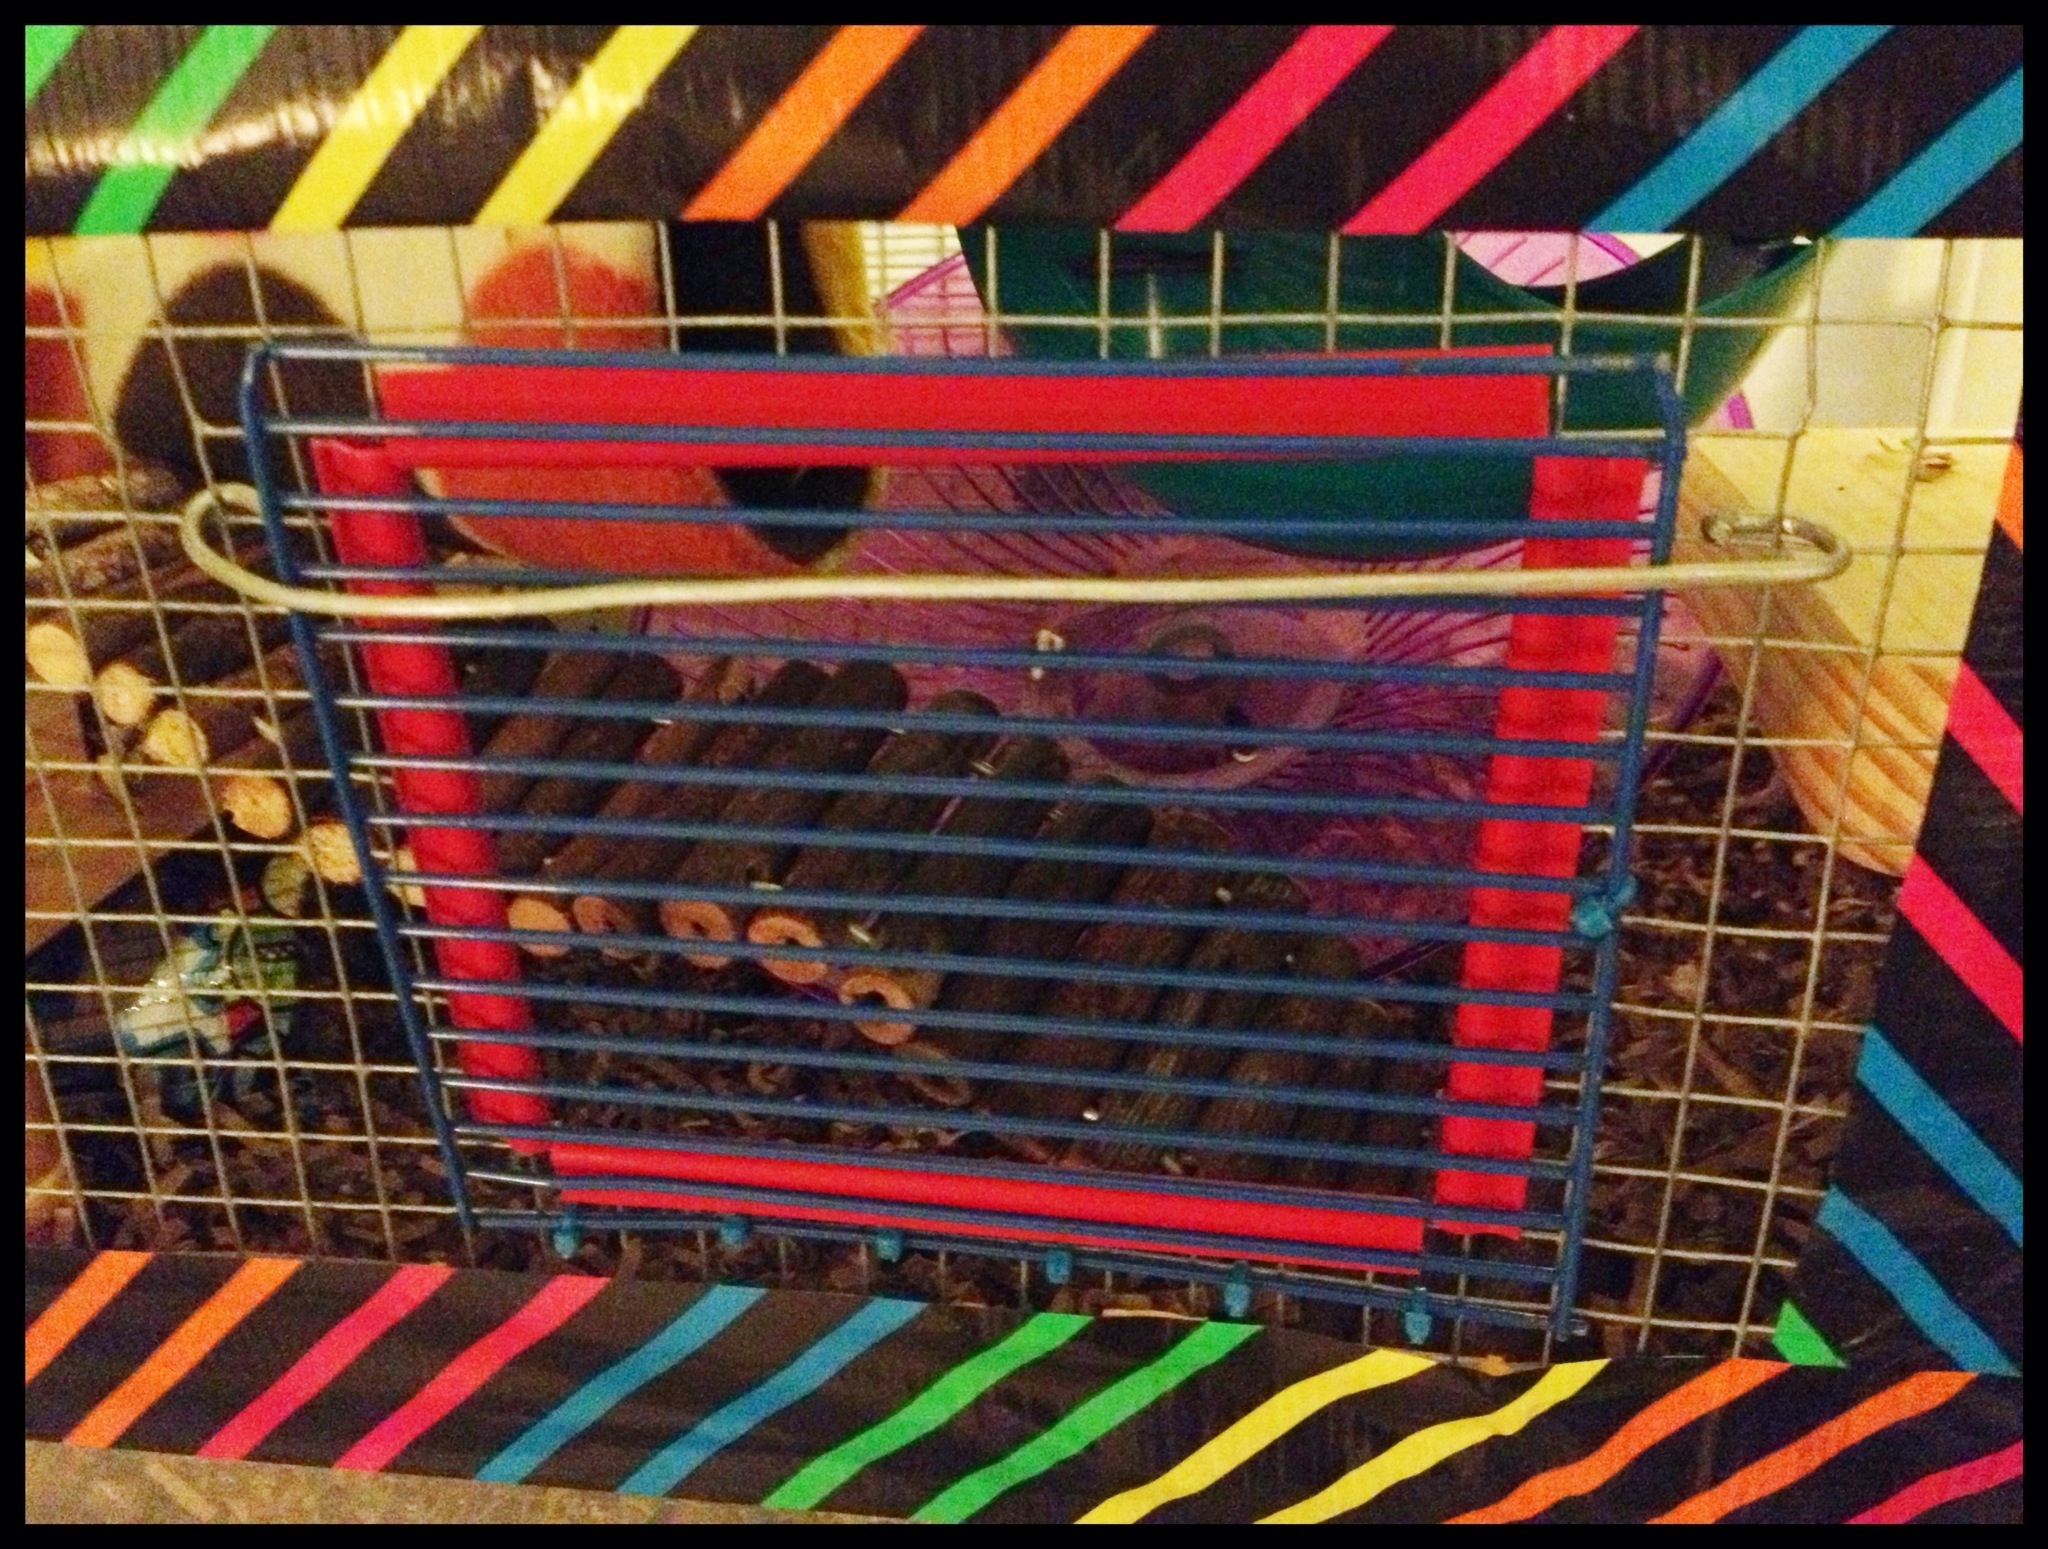

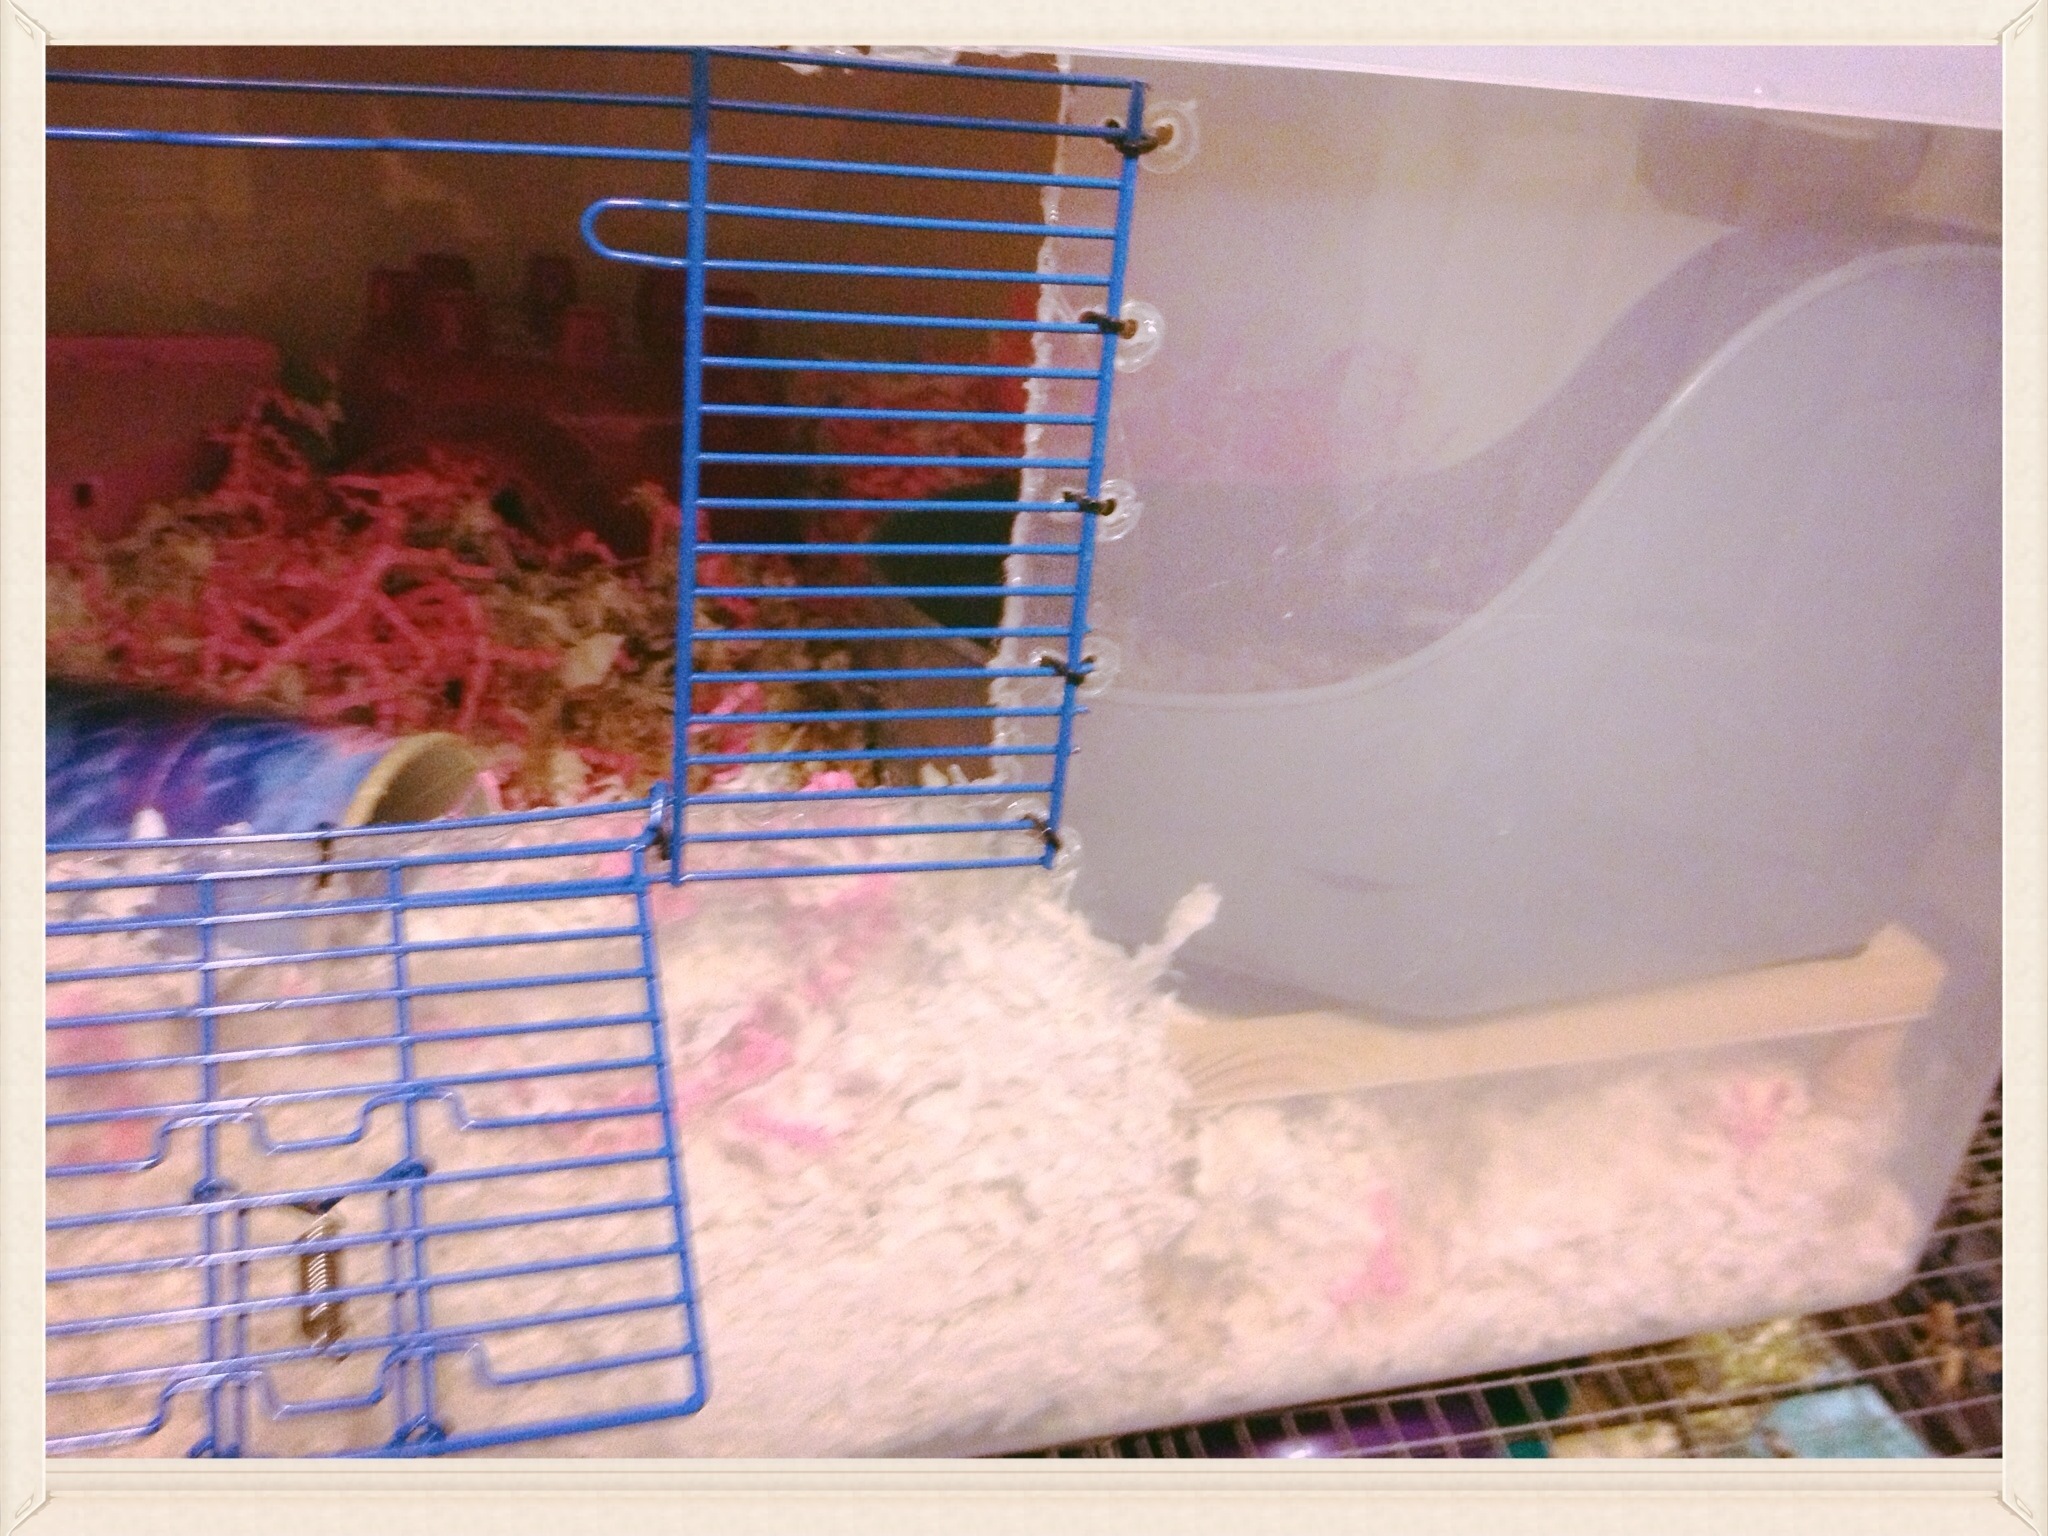
For the bottom door I used a clipped front panel of an old Critter Trail cage. Both work fantastic for letting Penny out or reaching in for feeding or grabbing the water bottle (which I have velcroed to the side from the inside) or little adjustments inside the cage – without having to life the lids. I also used bolts and bolted the bottom bin’s lid to the bottom of the top bin. So when I life the top bin the lid of the bottom bin comes right up. This is time saving convenience.
And the pink shelf in the picture – with the bendy wooden arch – that is the platforms which Penny uses with ease to jump up through the hole in the lid and bottom of the floor to get to the 2nd floor.

Just with anything concerning hammys – safety first! Think like a rodent and be sure your latching is secure and safe and escape proof!
EDIT: 11-2013 – The bottom portion of this bin now has two meshed windows on the sides for more ventilation. In these pictures you will see there just wasn’t enough ventilation until I added more meshed windows.

Pingback: DIY Bin Cage (double deckering it too) | Hammy Happenings
Pingback: Bin or aquarium with topper - Hamster Central
Wow it’s amazing 😀
Thank you so much for your comment!
Pingback: NewbieOwner here - what cage. - Page 2 - Hamster Central
Pingback: Bincage Idea - Hamster Central
this is so cute and really well made!! what a lucky hamster 🙂
Thank you!
Oh my goodness! I’m in love with this bin cage, its so cute! I was wondering, where did you get the plastic bin on the top?
Thank you! It’s a Sterilite 105qt from Walmart. They sell the 110 qt at Big Lots.
Wow! You have inspired me to make a bin cage for my daughter’s new hammy..what a lovely job you have done.Thank you:)
This makes my day!!!! Good luck and if you have any questions I will help to the best of my ability!!!
Hi,
I love this cage! I am in the process of building one and was wondering if you had any problems with your hamster chewing the cable ties? I’ve had dwarf hamsters before and they chewed on everything.
Thanks!
I have NOT had any issue with that. I’ve had all the species in the bin cages too. (Except Chinese) and not had an issue. however, none of my guys (and one gal) are big chewers at all. So, I think that a big chewer might. Just keep a sharp eye on it!
Love it! I started working on one for my Lloyd! Hope to have it done tonight 🙂 just need a stand up wheel and a few things
That is awesome! If you ever want to please share a picture!!! I love seeing pictures of people’s bin cages!!!
This gave me the idea to make 2-story bin for my hamster, your article helped a lot in the process. So thanks for the help, Minnie loves her new home!
I just updated it to include two links to Amazon.com for tubing I feel MAY be appropriate for Syrian’s double decker bins as the one pictured is with smaller tubes more appropriate for Dwarf hamsters. I am not sure what species yours is but if you have a Syrian there is a product marketed for Ferrets that would work well for Syrian tubing. Another by Ware that could work if the hamster isn’t a super plastic chewer.
Do you sell these? I am interested in purchasing one
Bins are really easy to make. And in the U.S the supplies are inexpensive. I myself don’t have the time to make any more as I have an infant and 3 year old. I made these while my infant was a newborn and slept a LOT. Now I don’t have the time – and this will take some time! A couple hours at least.
Maybe in the future. I know I’ve seen people in business making bin cages for people. It’s really fun when you have the extra time. I think that if you are physically able to (I know some people have issues with joints, arthritis, and the like 😦 ) then it’s worth the effort!!!
Pingback: Indecisive - Page 2 - Hamster Central
I just made my first one! When I went to get supplies to finish, I saw a wood burning kit. It has a perfect tip to make a straight line, it makes the plastic thinner, so I had to cut less and less chance of splitting. I did one side with the soldering iron, and the other side and top with the wood burner. Won’t go back to the soldering iron! =D Prior to this, I made a cut out on half of a top of a bigger bin and attached hardware cloth with zip ties and it is for a chick brooder! If not for the hamster bin cage instructions, I’d never had made something so simple for the soon to hatch chicks!
This is so awesome to here! Baby chicks? Awwwww
ow you inspired me for the decoration cage of my guinea pig^^ I love your bin cage!!
Thank you and that’s awesome!!!
This is awesome
How did you connect the bins?
I read sonething about using
The super pet puzzle playground
Pieces ( the piece with the hole in them for the hamster to crawl thru)
And soldering hole in the 4 corners or the piece then cutting a hole in the bin and connect the piece with cable ties. !
Then doing the same for the next bin
and connect the tube
But what if the tube I’m getting doesn’t snap onto the puzzle piece, I’m getting a Syrian hamster and I’m getting the tube you mentioned in the article so will this work?
Please answer , can you explain step by step please .
I meant soldering holes in the corners of the piece to connect it to the holes I will put in the bin with zip ties.
Pingback: My new hamster doesn't seem happy? - Hamster Central
Pingback: Doubts on building my bin cage - Hamster Central
Hi!! I loved your cage. Is super cool and with a lot of style. You gave me a lot of ideas for my hamster cage decoration and supplies.
Yay!!! I am so glad it helped!!
Hi!! I loved your cage. Is super cool and with a lot of style. You gave me a lot of ideas for my hamster cage decoration and supplies.
Thank you and I would love to see it! I am not sure pics can be posted in comments though. So glad you found this helpful!!
On the hamster forum I am a member of a lot of people use habitrail ovo tubes for their syrians. http://www.amazon.com/Hagen-62705-Habitrail-Ovo-Tube/dp/B000VP8TYI/ref=sr_1_1?s=pet-supplies&ie=UTF8&qid=1374458248&sr=1-1&keywords=habitrail+ovo+tubes Your bin looks really nice. My syrian currently lives in a 40g breeder tank.
Thank you! I will add this to my write up about tubes!!!
I love these bins! I know these type run a bit pricey (13.99) i really wanted the 110 qt do you know where I can get it for a cheaper price?
I found the 110 in Biglots for less than 12 but I went in there the other day and they HAVE gone up to almost 14 bucks. I didn’t buy two more as I had planned either because of that price jump. I hope they drop in price again soon but the only place I have ever seen these has been Big Lots. My local Walmart doesn’t carry anything bigger than 106!
Where did you get the cable ties? I love them.
I got those ties from amazon.com! But I have seen them in biglots too from time to time! Just google neon color cable ties!
I found this extremely valuable. THANK YOU!!!!
Thank you for letting me know. It makes my day whenever I hear from someone!!
Where did you find the black and rainbow striped duct tape? Also, what size is the mesh you used, or would recommend for a dwarf hamster, like a winter white? Also, this is super cool and helpful, thank you!
1/2 inch as well 1/4 inch mesh squares/grid will both work for dwarves (Robos and Chinese included). The squares are tiny. 1/2 vertical or horizontal bars on a cage for a dwarf is another story of course). That neon striped tape is Scotch Duct tape! I got from the PX (military store) but you usually can find in any walmart, craft or online store!
I have a single fancy bear hamster, James Bond, and currently have 2 crittertrail cages connected. He seems to love it and it seems like a lot of space, but should I try and invest in a bigger one?
I made this page because of my beliefs in larger cages make happier hamsters. So i can only say that i feel you should. but to each their own. Syrians need at least an8 inch wheel but usually a 12 inch wheel and Crittertrails cannot even fit a wheel that size in them. My good friend has about 8 ovos and critter trails connected for her Syrian. The ovo I think has an 8 inch wheel connected. She feels her hamster is happy and she gets a lot of time out of her cage. So I believe her as she knows her own hamster!
I was told by a Petco associate that they don’t advise using hardware cloth wire because it contains high amounts of zinc which is poison to the hamster. Have you had any of your hamster pass away because of the poison of zinc? because i really want to make this diy and i already bought the materials 😦 i would hate to put my hamster in danger . Thank you!
P.S. He is not much of a chewer so i don’t think he will chew on the wire but i was just wondering to be safe.
http://hamsterhideout.com/forum/topic/61368-galvanized-mesh/?p=517451
I loved this post! I’m getting a Syrian hamster this week and I am trying to decide what to do for a cage. I know the store bought cages are way too small. Thanks for sharing this. Do you know how to make a level inside one cage so that a hamster could climb up and sit on a platform type thing? I don’t really know how it would stay and what to use. Maybe some sort of wood? Any help would be appreciated. Thanks!
What I have seen often in google image searches (I LOVE to image search other bin cages!) is a plastic organizer container. The 12×6 inches or so (estimated) sized organizers you can buy in stacked packs in dollars stores or Big Lots or Walmart etc. The ones with slotted sides that have thin flimsy “walls” are easy to cut with scissors and make an opening to hang a bird ladder (with cardboard attached for backing so the ham doesn’t slip through the slots of the ladder) and you can attach these containers by zip ties or bolts with nuts to the sides of the bin.
You can also use wood planks you can buy from craft stores or hardware stores – there you can have them cut to your specifications and then drill holes for bolts and attach with nuts to the sides. But I prefer cheap and easy and LIGHT. So, that is why I go with the organizer containers! Hope this helps!
Oh, one last idea is to make a pull out level. This is one I do often. I get wood dowels and use non toxic glue sticks for my glue gun and attach them to a plank of light weight wood. That can be pulled out and put back in for cleanings. It’s best when making wood platforms like that – to get a sealant to spray over it to waterproof it (in case of peeing). After applying sealant it’s best to let it air out and dry for a few days before putting it in.
My hams all use a sand box for weeing and much of their poops. But if you don’t supply a litter pan it’s likely your ham might take to weeing on the platform and that will ruin the wood of the platform really quickly!
Pingback: Bin Cages-help needed - Hamster Central
Pingback: Hamster Bin Cage - Hamster Central
Pingback: My New Baby...now to pick a name for a sweet girl. - Page 2 - Hamster Central
Pingback: A Bin Cage with Topper (with many warning notes) | Hammy Happenings
Pingback: 8 DIY-Hamsterkäfige, die Sie heute bauen können - HaustierBereich.de
Pingback: 32 DIY Guinea Pig Cage Plans For Small Spaces - DIY & Crafts
Pingback: 11 DIY Guinea Pig Cage Ideas - Newsgutter
Pingback: 10 DIY Guinea Pig Cage Ideas to Create Home for Your Furry Friend - Opple House
Pingback: 9 DIY Hamster Bin Cages You Can Make at Home (With Pictures) - Nirantara - Pet Care